The Dilemma
Anyone who has owned an RV knows that propane is a critical supply. Whether you are going out for a weekend or you live in your RV, you must have propane. While RVs vary some in their options, propane operates your refrigerator, furnace, stove, oven, and hot water heater. There is nothing worse than driving to that special camping spot, getting all set up, and realizing that you are out of propane.
Our old travel trailer had two external tanks similar to what you have on your BBQ at home, only larger capacity. We had an automatic switch so that when one tank ran out it would automatically switch to the second tank. A handy visual indicator made it easy to tell when one tank was empty. Before every trip, we checked our tanks and refilled as needed. Refilling was easy by simply removing the tank from the RV and driving it to the nearest refill station. This system worked great and we never ran out of propane in five seasons of RVing.
As we began shopping for an RV for this big adventure we’re on, it quickly became apparent that motorhomes differ from towable RVs in their propane configurations. While most towables have dual tanks that can easily be removed from the RV, motorhomes have a single, on-board tank that cannot be removed.
Why do the various RV types differ? Necessary design around a motorhome frame I suppose. Regardless there are two major disadvantages to the on-board tanks:
1. You have to take your entire RV in just to have the propane refilled. Whereas RVers with removable tanks can simply take their tank to the nearest refill location, we have to move our entire home. If we are set up in one location for an extended stay, this is a real inconvenience.
2. You are limited to where you can refill your tank. At RV friendly refill locations, this is not a problem. They have large parking lots and their tank is located such that you can pull up to the tank then straight through and out when done. There are no tight spaces or corners to maneuver and you do not have to back out when done (a critical feature for motorhomes with a tow vehicle). Unfortunately, we’ve found many propane refill locations are not RV friendly. On more than one occasion, I have called a business to inquire about their propane refill only to have them stay “we are not big rig friendly” or “we are not able to fill on-board tanks”.
We never thought that having to move our RV to fill propane would be an issue for us. We envisioned always moving every 7-14 days and we can easily go 14 days on one tank of propane. This reasoning was recently challenged, however, during our month long stay in Hurricane, Utah. We were in an area with great fall weather, friends nearby, tons of awesome hiking, and a great monthly rate at a conveniently located RV park. It was too good to pass up, but would our propane last an month through some of the coldest temperatures of the year? The logical answer, add a secondary propane tank to our motorhome.
The Solution
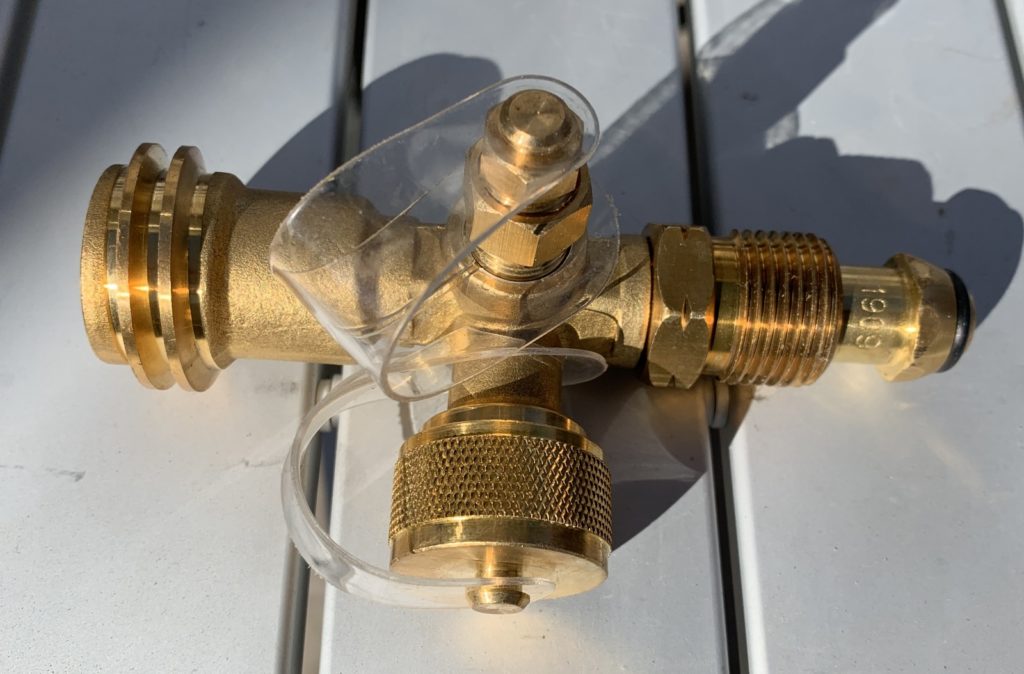
Mr. Heater makes a product known as a Stay A While. This is a brass tee with four ports that installs in-line with our existing LPG system. The tee allows connection of a secondary propane tank to our RV and also lets us run an appliance, such as a BBQ or camp stove off the same tanks.

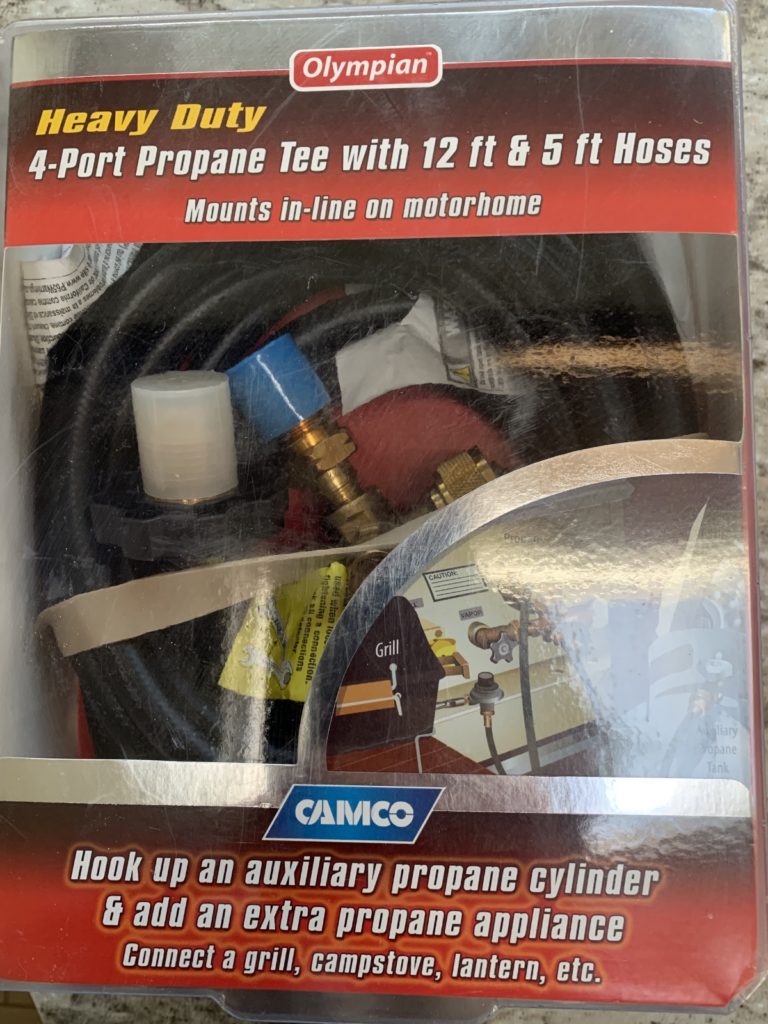
Camco makes an identical (and less expensive) product known as an Extend A Stay. We went ahead and purchased this product from Amazon. Jason installed the tee with ease, but it failed our leak test. Both ends that Jason connected were in good shape, but a joint fitting that is tightened, sealed, and tested by the manufacturer was leaking. A second look at Amazon customer reviews revealed that many others had experienced the same problem with the Camco product.
Next we tried the slightly more expensive Mr. Heater brand. We have a Mr. Heater Buddy that we love and have found to be of good quality. Amazon had the Stay A While for $84.14, but with below freezing temperatures just around the corner, we didn’t want to wait for shipping. We tried the local Ace, Home Depot, and Walmart. All had similar products, like a three way tee, but none had the four way. I discovered that Camping World sells the product online or ship-to-store for $83.82, so I called the local store and they had two on the shelf. When we got to the store, the product was marked with a regular price of $111.99, on sale now for $95.25. This did little to improve my already poor opinion of Camping World’s pricing policies. But…we wanted the product now and they had it now.
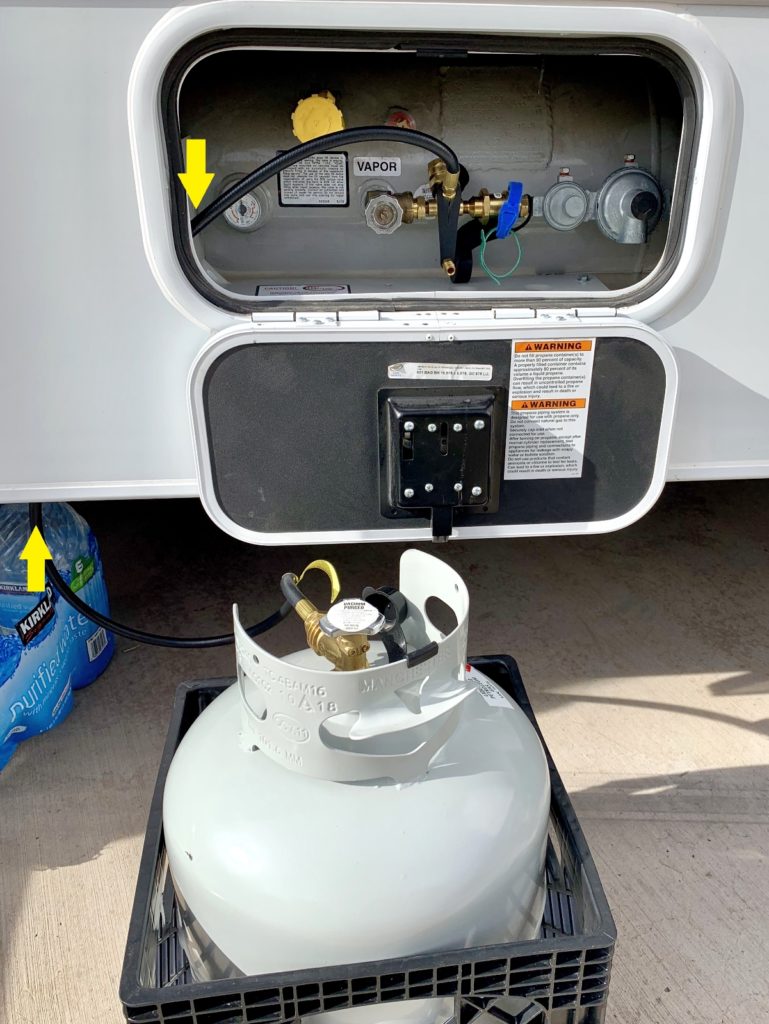
Regardless of brand, these tees come in a variety of options. You can purchase a 3 port which allows you to connect a secondary propane tank, but does not allow you to run an additional appliance. You can also purchase the tee with or without the necessary high pressure propane hoses. Both brands market the four tee with hoses as a “deluxe” and that is what we purchased. The only additional item required was the external propane tank which we purchased at a local propane store. We debated a larger tank, but went with this standard 20 lb. BBQ grill size since you can refill or exchange those just about anywhere.
Here are links to the products we’re describing. By accessing Amazon through our links and making any purchase, you get Amazon’s every day low pricing and they share a little with us. This helps us maintain Evans Outdoor Adventures and is much appreciated!
Installation
Installation was easy:
1. First (and most importantly), turn off your on-board propane!
2. Remove the protective cover from the regulator. Jason used a fastener removal tool to pop out two plastic fasteners holding it in place.
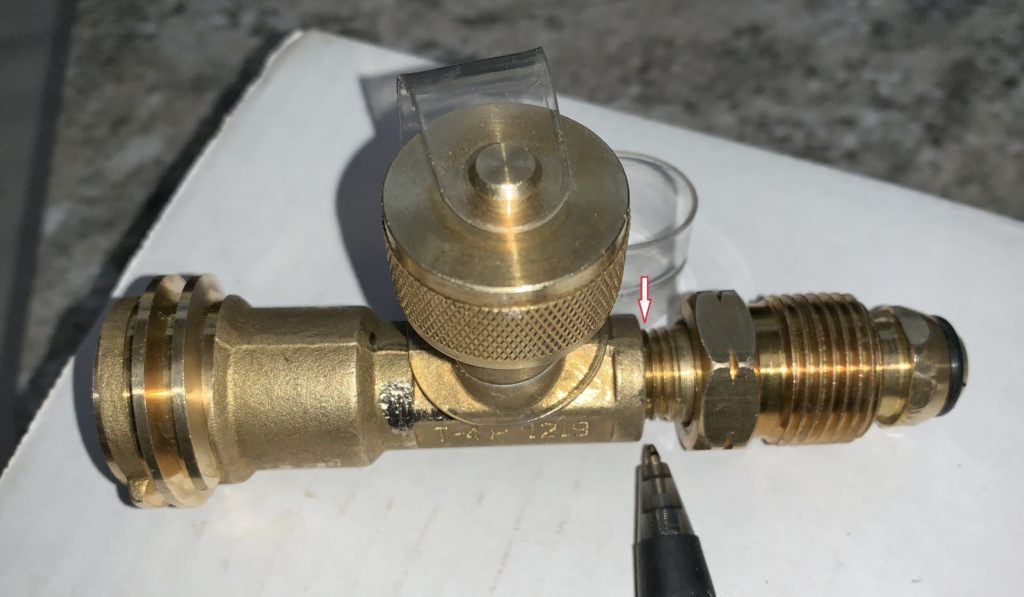
3. Remove the regulator from the main valve (note that these threads are reversed).
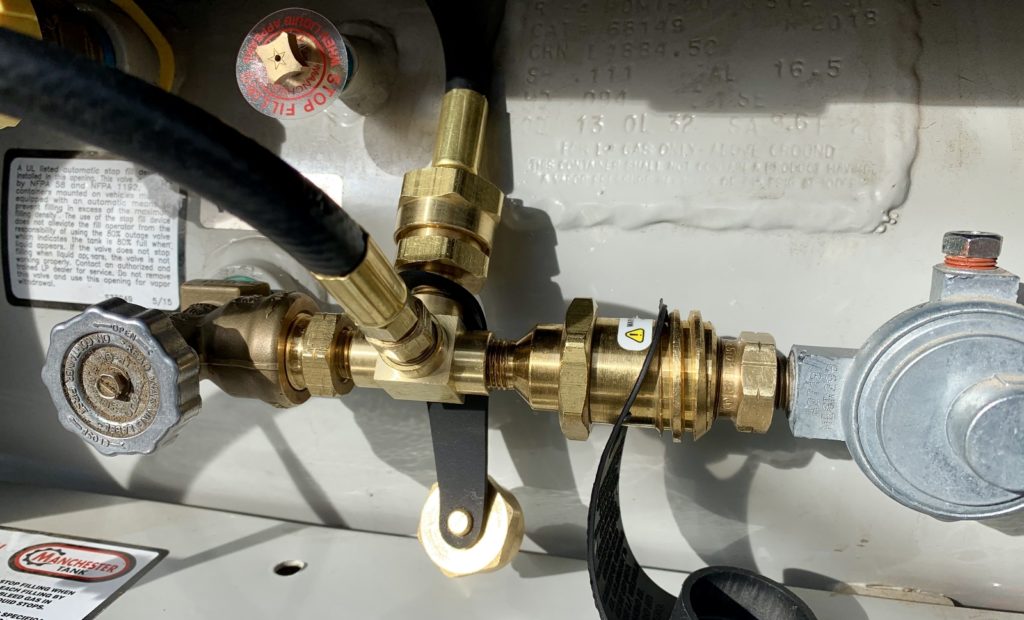
4. Connect the five foot hose to the tee that goes to the external tank. Jason found this easier to do before inserting the tee in the gas line because the entire hose turns when tightening.
5. Insert the tee between the main valve and the regulator and tighten with a wrench, first on the valve side then the regulator side (note that threads on both sides are reversed).
6. Pressure test all fittings first with the on-board tank on (external tank off) and then visa versa. Under no circumstances should you skip the pressure test! You might miss a propane leak! You can buy special products for this, but good old soapy water in a spray bottle works great.
7. If desired, connect the 12′ hose that goes out to the accessory appliance such as your BBQ grill.
8. To protect the regulator (which was now unprotected on the bottom), Jason bolted a piece of clear heavy duty Lexan onto the tank frame.
9. Once installed operation is easy. Simply turn on whichever tank you want to draw from (and turn the other off)!
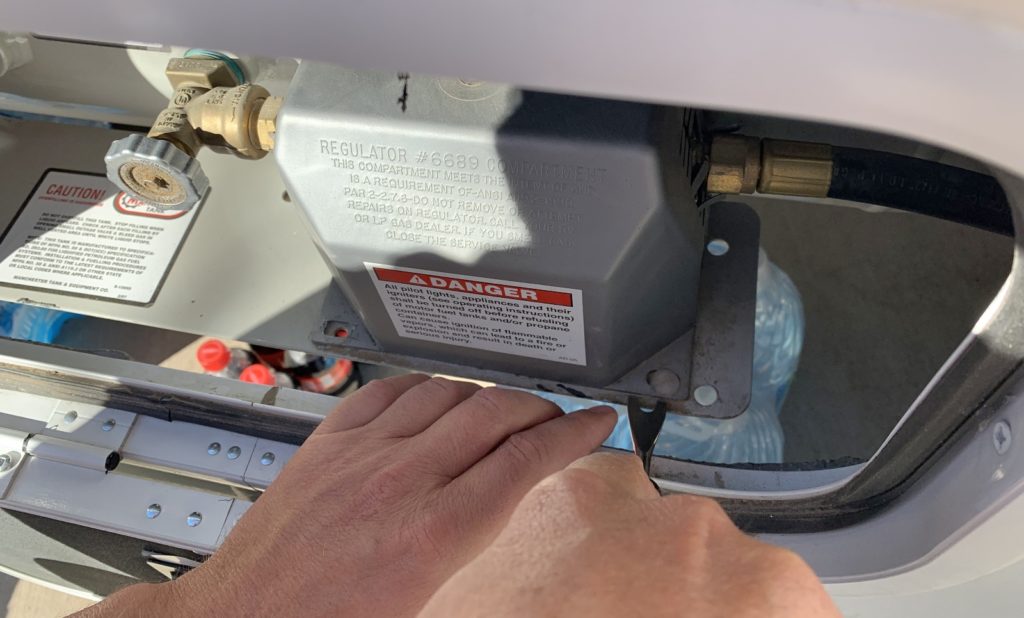
remove regulator cover 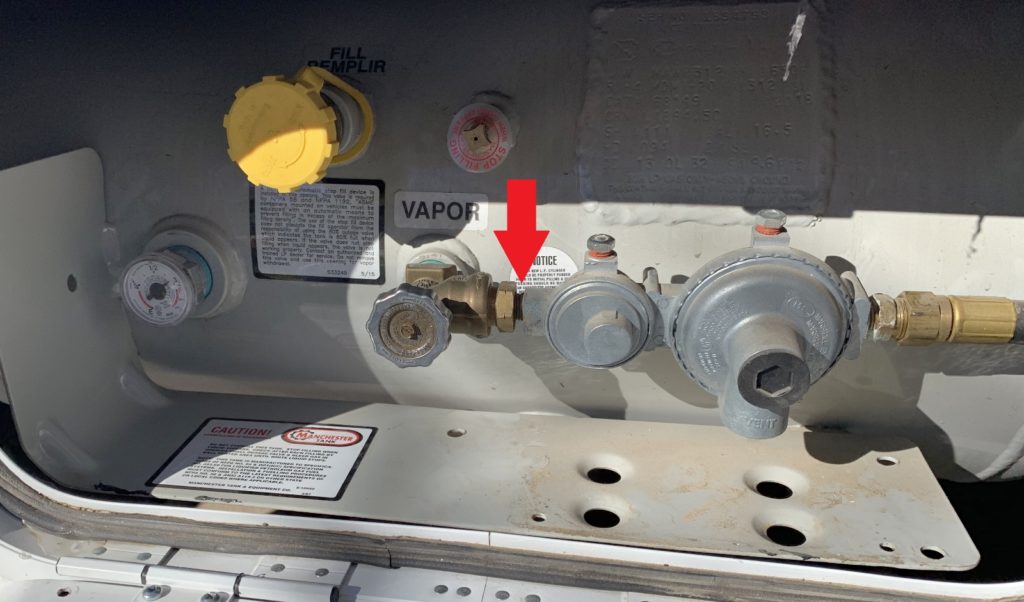
disconnect here
Our Mr. Heater Stay A While passed its leak test and we were in business. With two and a half weeks remaining on our monthly stay, we no longer needed to worry about running out of propane!
Hello cousin,
We learned the lesson of February camping in the PNW…and got portable heaters to save on propane. Happy Trails